Volo View Express 2.01 Commands
With Volo™ View Express, you can open and view the following types of files:
- AutoCAD® DWG, DXF™, and DWF files
- Volo View RML files
- Autodesk Inventor™ 5 IPT, IAM, and IDW files
- Raster files

Table of Contents
Click and View:
 Pan
Pan
Zooming
Layers
Layouts
Page Setup
Print
Volo View Express Commands
From your browser in the Volo View Express window click the
right mouse button to view a menu of Volo View Express commands. The Volo View
Express right click menu enables you to select from various modes of operation. This
section describes the right click menu commands available for Volo View Express
[Go to Table of Contents]
ZOOM
Zooming is like using a zoom lens on a camera. It changes magnification but doesn't
change the absolute size of objects in the image. You can zoom in and out dynamically with
cursor movement, or you can magnify a specific area. You can fit the entire image in the
window at one time and cycle forward and back through previous zooms. For example, you
might need to switch between detailed views of specific areas. You can do this by zooming
in to the first detail, then out to the entire image, in to the second detail, out again,
and so on. To switch between detail zooms, right-click in the image and click Zoom
Previous.
To zoom a file
dynamically (In/Out)
- Right-click in the image, click Zoom, and then click In/Out.
- Click in the image, hold the mouse button down, and move the cursor up to zoom in, or
down to zoom out. You can move the cursor anywhere on the screen.
- Release the mouse button when the image is at the required magnification. The zoom tool
remains active until you select another tool.
- To switch to panning, press CTRL and right-click. Use the left mouse button to pan, or
you can click Pan on the drawing's shortcut menu.
To Zoom Previous
- Right-click in the image, click Zoom, and then click Previous.
To Zoom Window
Right-click in the image, click Zoom, and then click Window.
Click in the image to start the zoom window.
Drag and release to end the window around the area you want to magnify.
To Zoom All
- Right-click in the image, click Zoom, and then click All.
[Go to Table of Contents]
LAYERS
Using Volo View Express 2, if you right click and choose Layers, the
Layers dialog opens from which you can turn layers on and off. The Layers dialog works
like most Explorer dialog boxes in that you can select one or more layers and click the
light bulb icon to turn on or off all of the selected layers. Layers are toggled based on
the state of the light bulb icon when you click it. Pressing the space bar is the same as
clicking the light bulb icon.
[Go to Table of Contents]
- LAYOUTS
A layout is a paper-space environment that provides a predictable plotting setup.
Layouts exist in AutoCAD drawing files and are the electronic version of a sheet of
paper. An AutoCAD drawing can have multiple layouts, each with a different plot scale,
paper size and active layers. Each layout displays the drawing as it will be plotted on a
sheet of paper.
To view a drawings layout, right-click in the image to bring up the Volo Menu Dialog
box and select Layouts. In the Layouts dialog box, select the layout you want to view.
[Go to Table of Contents]
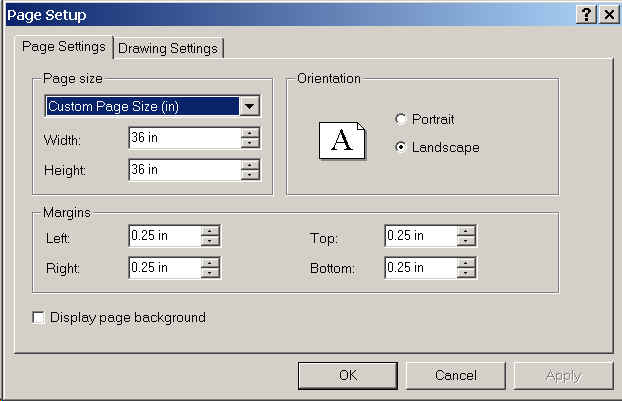
PAGE SETUP
In the Page Setup dialog box, you can create and change a background page for
markups and printing. Settings in the Page Setup dialog box determine:
- Position and size of a background page of an image
- Print area
- Size of markup text
- Settings for ePlot and eView in DWF files
- Layout settings in DWG files
To set page size, margins, or orientation, in the Page Setup dialog box, choose the
Page Settings tab.
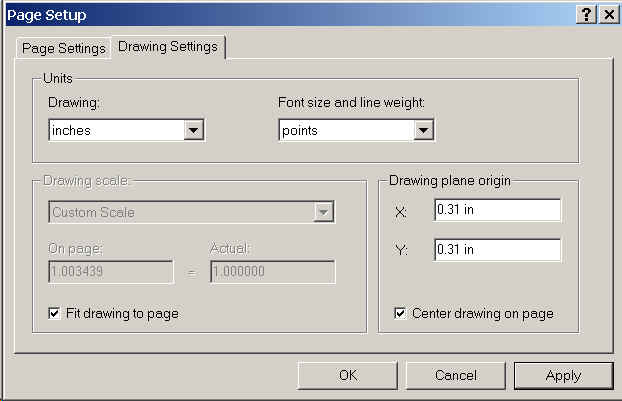
To set the image's units, font size, or line weight, or to set drawing scale or origin,
in the Page Setup dialog box, choose the Drawing Settings tab.
[Go to Table of Contents]
PRINT
To print a DWG, right click and choose Print. The view that is currently
visible in the Volo View Express 2 window is printed using the standard system
print controls. Using the right click menu Print command prints only the DWF or DWG file.
The print fills the available printing area as defined by your system
printer settings.
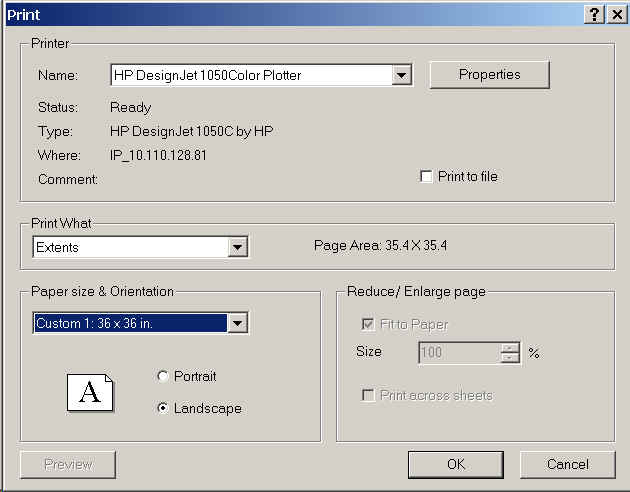
Select the Properties button to get to the paper set up screen.
Please note that the Volo view drawing must first be zoomed to all
window for this to work.
[Go to Table of Contents]